カテゴリー: サーバ管理

  • Debian 9 Stretch で連続接続を Fail2ban ではじく

    Debian 9 Stretch で連続接続を Fail2ban ではじく

    Fail2ban は、ログを参照して認証エラーを繰返しているホストを ban するための Python 製のツールです。iptables で接続制御をするのは ufw と同じですが、Fail2ban はより柔軟にログを分析して接続を制御します。

    インストール

    $ sudo apt install fail2ban
    $ sudo fail2ban-client status
    Status
    |- Number of jail: 1
    `- Jail list: sshd

    設定

    /etc/fail2ban/jail.conf の中には次のような記述があります。

    # YOU SHOULD NOT MODIFY THIS FILE.
    #
    # It will probably be overwritten or improved in a distribution update.
    #
    # Provide customizations in a jail.local file or a jail.d/customisation.local.
    # For example to change the default bantime for all jails and to enable the
    # ssh-iptables jail the following (uncommented) would appear in the .local file.
    # See man 5 jail.conf for details.

    jail.cof は更新時に上書きされる可能性があるので、jail.local 等の別名ファイルを作成して差分を記述するようにしましょう、ということです。

    /etc/fail2ban/jail.conf 次のように書きます。ufw と組合せているので、ufw の limit を考慮しないとずっと ban されないことになります。

    [DEFAULT]
    bantime = 1800
    findtime = 600
    maxretry = 5
    
    [postfix-sasl]
    enabled = true
    
    [dovecot]
    enabled = true

    設定を再読込したら完了です。

    $ sudo systemctl reload fail2ban
    $ sudo fail2ban-client status
    Status
    |- Number of jail: 3
    `- Jail list: dovecot, postfix-sasl, sshd
    $ sudo fail2ban-client status sshd
    Status for the jail: sshd
    |- Filter
    | |- Currently failed: 1
    | |- Total failed: 7
    | `- File list: /var/log/auth.log
    `- Actions
     |- Currently banned: 0
     |- Total banned: 0
     `- Banned IP list:

    自分でフィルタやアクションを定義することもできますが、とりあえずはこれで様子を見てその都度変更していこうと思います。

    bantime

    接続を拒否する時間を秒で指定します。

    # "bantime" is the number of seconds that a host is banned.
    bantime = 600

    findtime と maxtretry

    findtime 秒間の間に maxretry 回の認証失敗があったときに拒否対象となります。標準の findtime = 600, maxretry = 5 であれば 600秒間に 5 回の試行で拒否対象となります。

    # A host is banned if it has generated "maxretry" during the last "findtime"
    # seconds.
    findtime = 600
    
    # "maxretry" is the number of failures before a host get banned.
    maxretry = 5

    参考

  • Debian 9 Stretch で ufw による簡単ファイアウォール設定

    Debian 9 Stretch で ufw による簡単ファイアウォール設定

    Linux 環境でファイアウォールを構築するお話です。

    Linux にはカーネルレベルでパケットフィルタや NAT を行う netfilter という仕組みがあり、それを設定するのが iptables です。iptables をそのまま扱えれば一番良いのですが、柔軟さ故に学習コストは高めです。そのため、firewalld や ufw といった iptables のフロントエンドが存在しています。今回は ufw を使います。

    ufw は Uncomplicated Firewall の略で、Python で書かれた iptables のフロントエンドです。

    以下、インストールと簡単な使い方です。

    インストールと有効化

    $ sudo apt install ufw
    $ sudo ufw enable
    Command may disrupt existing ssh connections. Proceed with operation (y|n)? y
    Firewall is active and enabled on system startup
    $ sudo ufw status
    Status: active

    SSH で作業しましたが、有効化しても切断されることはありませんでした。絶対に切断されないとは言い切れないので、念のため切断されたら八方塞りになる状況では止めておきましょう。

    全てを deny して SSH のみ allow する

    $ sudo ufw default deny
    Default incoming policy changed to 'deny'
    (be sure to update your rules accordingly)
    $ sudo ufw allow ssh
    Rule updated
    Rule updated (v6)
    atmark@dev:~$ sudo ufw status
    Status: active
    
    To Action From
    -- ------ ----
    22/tcp ALLOW Anywhere 
    22/tcp (v6) ALLOW Anywhere (v6)

    たったこれだけです。default を deny して、ssh を allow するだけ。簡単ですね。

    アプリケーション単位で allow/deny する

    ufw app list で有効なアプリケーションの一覧が表示されます。

    $ sudo ufw app list
    Available applications:
     AIM
     Bonjour
     CIFS
     DNS
     Deluge
     Dovecot IMAP
     Dovecot Secure IMAP
     IMAP
     IMAPS
     IPP
     KTorrent
     Kerberos Admin
     Kerberos Full
     Kerberos KDC
     Kerberos Password
     LDAP
     LDAPS
     LPD
     MSN
     MSN SSL
     Mail submission
     NFS
     OpenSSH
     POP3
     POP3S
     PeopleNearby
     Postfix
     Postfix SMTPS
     Postfix Submission
     SMTP
     SSH
     Socks
     Telnet
     Transmission
     Transparent Proxy
     VNC
     WWW
     WWW Cache
     WWW Full
     WWW Secure
     XMPP
     Yahoo
     qBittorrent
     svnserve

    この名前をつかって deny/allow するだけです。

    $ sudo ufw allow SSH
    $ sudo ufw allow "WWW Full"
    $ sudo ufw status
    Status: active
    
    To Action From
    -- ------ ----
    SSH LIMIT Anywhere 
    WWW Full ALLOW Anywhere 
    SSH (v6) LIMIT Anywhere (v6) 
    WWW Full (v6) ALLOW Anywhere (v6)

    ルールの削除

    2 通りあります。まずは追加したルールをそのまま削除するやり方。

    $ sudo ufw delete allow SSH

    もう一つは現在のルール一覧を番号付けして、その番号で削除するやり方。

    $ sudo ufw status numbered
    Status: active
    
    To Action From
    -- ------ ----
    [1] SSH LIMIT Anywhere 
    [2] WWW Full ALLOW Anywhere 
    [3] SSH (v6) LIMIT Anywhere (v6) 
    [4] WWW Full (v6) ALLOW Anywhere (v6) 
    
    $ sudo ufw delete 4
    Deleting:
     allow 'WWW Full'
    Proceed with operation (y|n)?

    名前で指定するか、ポート番号で指定するか

    ちょっとややこしかったので、軽くまとめておきます。

    app list で表示される内容は /etc/ufw/applicatoin.d/ 以下に用意されています。例えば WWW 関係は次のようになっています。

    $ cat /etc/ufw/application.d/ufw-webserver 
    [WWW]
    title=Web Server
    description=Web server
    ports=80/tcp
    
    [WWW Secure]
    title=Web Server (HTTPS)
    description=Web Server (HTTPS)
    ports=443/tcp
    
    [WWW Full]
    title=Web Server (HTTP,HTTPS)
    description=Web Server (HTTP,HTTPS)
    ports=80,443/tcp
    
    [WWW Cache]
    title=Web Server (8080)
    description=Web Server (8080)
    ports=8080/tcp

    ルールを追加するときのポートの指定は 3 通りあって

    • ポート番号の直接指定 – 443/tcp
    • プロトコル名 – https
    • アプリケーション名 – WWW Secure

    このうち、ポート番号の直接指定もプロトコル名も、ルールに登録されるのは数字のポート番号そのものです。allow https としても 443/tcp でルールに登録されます。

    アプリケーション名で指定すると、指定した名前そのままで登録されます。

    ここでややこしいのが、例えばアプリケーション名とプロトコル名が同じ SSH の場合。allow SSH と書くと名前で登録されますが、allow ssh とすると 22/tcp で登録されます。

    接続制限 limit

    $ sudo ufw limit ssh

    もう一つ、limit というルールがあります。man には次のよう書かれています。

    ......
    ufw will normally allow the connection
    but will deny connections if an IP address attempts
    to initiate 6 or more connections within 30 seconds
    ......

    30 秒間に 6 回以上接続を試みた場合に接続を拒否するルールです。SSH などは総当りでログイン試行が来るので、limit をかけておいた方が良いでしょう。

    参考

  • Postfix を MTA 間 TLS 通信に対応させる (Debian 9 Stretch)

     前回の記事の続きです。前回までの内容でクライアントからサーバまでの通信は SSL による暗号化が成されるようになりましたが、自サーバから相手サーバまでの通信経路はまだ平文のままです。

    Postfix の設定を少し変えるだけで、サーバ間の通信を TLS に対応させることができます。Debian 9 Stretch 環境での設定例を示します。

    /etc/postfix/main.cf

    ...
    smtp_tls_CAfile = /etc/ssl/certs/ca-certificates.crt
    smtp_tls_security_level = may
    smtp_tls_loglevel = 1
    ...

    “smtp_tls_CAfile” には接続先を検証するためのルート証明書を指定します。サーバ証明書は関係ないので間違えないように。

    “smtp_tls_security_level” は “may” に設定すると可能な場合は TLS を、それ以外なら通常の SMTP で送信します。”encrypt” とすると TLS を強制できますが、対応してないサーバがあると中断されます。

    ルート証明書の更新

    念のためルート証明書の更新も行っておきます。

    # update-ca-certificates
    Updating certificates in /etc/ssl/certs...
    0 added, 0 removed; done.
    Running hooks in /etc/ca-certificates/update.d...
    
    done.
    done.

    検証とログの確認

    検証は Gmail 宛にメールを送ると簡単です。Gmail で受信したメールには送信者が TLS を使用したかが簡単にわかるようにアイコンが表示されます。以下は iOS の Gmail アプリの例です。

    サーバ側のログも確認します。ルート証明書が正しく指定されていないと、次のように “Untrusted TLS connection established” のログが残ります。通信自体は暗号化されていますが、接続先の証明書が検証できなかったことを示しています。

    /var/log/mail.log

    ...
    Sep 18 10:43:52 150-95-153-XXX postfix/smtp[25050]: Untrusted TLS connection established to gmail-smtp-in.l.google.com[108.177.97.26]:25: TLSv1.2 with cipher
 ECDHE-RSA-CHACHA20-POLY1305 (256/256 bits)
    ...

    正しいルート証明書による接続先の検証が成功した場合は、次のように “Trusted TLS connection established” が残ります。

    ...
    Sep 18 10:53:36 150-95-153-XXX postfix/smtp[25506]: Trusted TLS connection established to gmail-smtp-in.l.google.com[64.233.189.27]:25: TLSv1.2 with cipher ECDHE-RSA-CHACHA20-POLY1305 (256/256 bits)
    ...

    参考

  • Let’s encrypt + Postfix で SMTP-Auth over SSL なメールサーバ構築 (Debian 9 Stretch)

    事前に DNS の設定を済ませておきます。今回は example.com の MX レコードを mail.example.com に設定してあります。

    環境

    • OS: Debian 9 (Stretch)
    • VPS: ConoHa 512 MB

    Postfix のインストール

    # apt install postfix
    apt install postfix
    apt install postfix

    “Postfix Configuration” では “Internet Site” を選択します。

    Postfix の設定

    設定項目が多すぎてどこを変更したのかわからなくなるので、元のファイルを残しておきます。

    # cp /etc/postfix/main.cf /etc/postfix/main.cf.backup
    # cp /etc/postfix/master.cf /etc/postfix/master.cf.backup

    /etc/postfix/main.cf

    ...
    # SASL
    smtpd_sasl_auth_enable = yes
    smtpd_sasl_type = dovecot
    smtpd_sasl_path = private/auth
    
    # TLS parameters
    smtpd_tls_cert_file=/etc/letsencrypt/live/example.com/fullchain.pem
    smtpd_tls_key_file=/etc/letsencrypt/live/example.com/privkey.pem
    smtpd_use_tls=yes
    smtpd_tls_session_cache_database = btree:${data_directory}/smtpd_scache
    smtp_tls_session_cache_database = btree:${data_directory}/smtp_scache
    # MTA間TLSの設定
    smtp_tls_CAfile = /etc/ssl/certs/ca-certificates.crt
    smtp_tls_security_level = may
    smtp_tls_loglevel = 1
    ...
    myhostname = mail.example.com
    ...
    home_mailbox = Maildir

    追記: 「MTA 間 TLS の設定」を加えました(2018-09-18)

    /etc/postfix/master.cf

    ...
    smtps inet n - y - - smtpd
    # -o syslog_name=postfix/smtps
     -o smtpd_tls_wrappermode=yes
     -o smtpd_sasl_auth_enable=yes
    # -o smtpd_reject_unlisted_recipient=no
    # -o smtpd_client_restrictions=$mua_client_restrictions
    # -o smtpd_helo_restrictions=$mua_helo_restrictions
    # -o smtpd_sender_restrictions=$mua_sender_restrictions
    # -o smtpd_recipient_restrictions=
     -o smtpd_relay_restrictions=permit_sasl_authenticated,reject
    # -o milter_macro_daemon_name=ORIGINATING
    ...
    # systemctl restart postfix

    Dovecot のインストール

    POP3 は使わないので、IMAP だけインストールします。

    # apt install dovecot-imapd

    Dovecot の設定

    こちらも元のファイルは残しておきしょう。

    # cp /etc/dovecot/conf.d/10-master.conf /etc/dovecot/conf.d/10-master.conf.backup
    # cp /etc/dovecot/conf.d/10-ssl.conf /etc/dovecot/conf.d/10-ssl.conf.backup
    # cp /etc/dovecot/conf.d/10-mail.conf /etc/dovecot/conf.d/10-mail.conf.backup

    /etc/dovecot/conf.d/10-mail.cf

    ...
    mail_location = maildir:~/Maildir
    ...

    /etc/dovecot/conf.d/10-master.cf

    ...
    inet_listener imaps {
        port = 993
        ssl = yes
    }
    ...
    # Postfix smtp-auth
        unix_listener /var/spool/postfix/private/auth {
        mode = 0666
    }

    /etc/dovecot/conf.d/10-ssl.cf

    ...
    ssl = yes
    ...
    ssl_cert = </etc/letsencrypt/live/example.com/fullchain.pem
    ssl_key = </etc/letsencrypt/live/example.com/privkey.pem
    ...
    # systemctl restart dovecot

    参考文献

  • Apache2-mpm-itk でバーチャルホスト別にユーザ管理 (Debian 9 Stretch)

    目的

    サブドメインをユーザごとに割当てた Web スペースを用意したい。例えばユーザ foo と bar がいて

    • foo.example.com -> /home/foo/www
    • bar.example.com -> /home/bar/www

    のように参照する構成にしたい。加えてそれぞれのディレクトリを参照する際の Apache の実行ユーザは、ディレクトリのオーナーと揃えたい(/home/foo/www を参照するときの実行ユーザは www-data ではなく foo)。

    必要なもの

    サブドメインをそれぞれのユーザに割り当てるには VirtualHost を使います。実行ユーザをディレクトリで変更するには、apache2-mpm-itk を使って設定に AssignUserID username groupname とすればできます。

    環境

    • OS: Debian 9 (Stretch) 64bit
    • VPS: ConoHa 512MB
    • DNS: お名前.com

    DNS の設定

    ドメインを取得したところに応じて先に設定しておいてください。今回は foo.example.com の A レコードに VPS のグローバル IP アドレスを設定しました。

    インストール

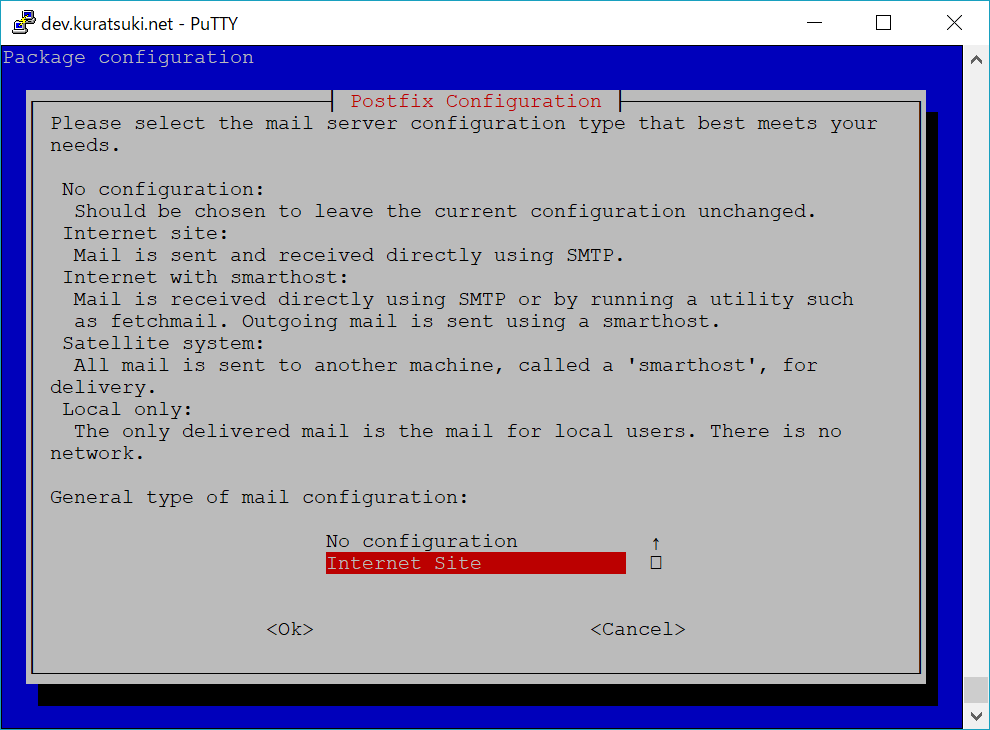
    Debian 9 (Strech) の場合は apache2 と libapache2-mpm-itk を apt で install します。

    # apt install apache2 libapache2-mpm-itk
    # a2dismod mpm_evnet
    # a2enmod mpm_itk
    # systemctl restart apache2

    サブドメインの VirtualHost を設定する

    今回は foo.example.com を /home/foo/www に割当てます。最近の Debian 系の流儀に倣い、/etc/apache2/sites-available 以下に設定ファイルを作成します。

    # vi /etc/apache2/sites-available/foo.conf

    /etc/apache2/sites-available/foo.conf

    <VirtualHost *:80>
        ServerName foo.example.com
        DocumentRoot /home/foo/www
        AssignUserID foo foo
        
        <Directory /home/foo/www>
            Require all granted
        </Directory>
        
        ErrorLog ${APACHE_LOG_DIR}/foo/error.log
        CustomLog ${APACHE_LOG_DIR}/foo/access.log combined
    </VirtualHost>

    <Directory> ディレクティブは Web スペースの利用用途によって書き換えてください。例えば .htaccess による上書きを全て許可し、CGI を動かすのであれば次のようになります。

        <Directory /home/foo/www>
            AllowOverride All
            Options +ExecCGI
            AddHandler cgi-script .cgi
            Require all granted
        </Directory>

    foo.example.com へのアクセスはログを分けます。ログの保存先は予め作成しておきましょう。

    # mkdir /var/log/apache2/foo

    作ったサイトを有効にします。

    # a2ensite foo

    ここまで進んだら設定の再読込を行い、foo.example.com にアクセスできるか確認してみましょう。サブドメインが増えても新たに設定ファイル .conf を作ってここまでの手順を繰返すだけです。

    # systemctl reload apache2

     ワイルドカード証明書

    以下の方法は自動更新に対応できていません。3 ヶ月毎に同じ手順を踏む必要があります。

    続いて、今の時代は HTTPS が当り前なので SSL 証明書の設定を行います。サブドメイン毎に証明書を取得することもできますが、目的は通信の暗号化だけなのでワイルドカード証明書 (*.example.com) を設定します。

    apt install certbot で入る certbot は古くてワイルドカード証明書を取得できないので、github から最新の certbot を git clone して使います。オプションが多いので改行入れていますが、一行で実行しても構いません。

    # apt install git
    # git clone https://github.com/certbot/certbot.git
    # cd certbot
    # ./certbot-auto certonly --manual -d *.example.net \
    -m [email protected] --agree-tos \
    --manual-public-ip-logging-ok --preferred-challenges dns-01
    Saving debug log to /var/log/letsencrypt/letsencrypt.log
    Plugins selected: Authenticator manual, Installer None
    Obtaining a new certificate
    Performing the following challenges:
    dns-01 challenge for example.com
    
    - - - - - - - - - - - - - - - - - - - - - - - - - - - - - - - - - - - - - - - -
    Please deploy a DNS TXT record under the name
    _acme-challenge.example.com with the following value:
    
    y-oBF_mUCy6EafROfLJAvnEujA2ot_xvC4zCcJKkJ8U
    
    Before continuing, verify the record is deployed.
    - - - - - - - - - - - - - - - - - - - - - - - - - - - - - - - - - - - - - - - -
    Press Enter to Continue

    今回はお名前.com を使っているので、お名前.com の DNS 設定を開きます。”_acme-challenge” の TXT レコードを追加して、内容を following value の値に設定します。DNS の設定が反映されまで少々時間がかかるので、まだ Enter キーは叩かないでください。

    Windows PC を使っているならコマンドプロンプトを開き、nslookup を叩いてみます。

    C:\> nslookup -type=TXT _acme-challenge.example.com
    サーバー: one.one.one.one
    Address: 1.1.1.1
    
    権限のない回答:
    _acme-challenge.example.com text =
    
     "y-oBF_mUCy6EafROfLJAvnEujA2ot_xvC4zCcJKkJ8U"

    設定した値が表示されたら Enter キーを押して進みましょう。まだ反映されてなかったら “_acme-challeng.example.com を見つけられません: Non-existent domain” と表示されます。

    Waiting for verification...
    Cleaning up challenges
    
    IMPORTANT NOTES:
     - Congratulations! Your certificate and chain have been saved at:
     /etc/letsencrypt/live/example.com/fullchain.pem
     Your key file has been saved at:
     /etc/letsencrypt/live/example.com/privkey.pem
     Your cert will expire on 2018-12-10. To obtain a new or tweaked
     version of this certificate in the future, simply run certbot-auto
     again. To non-interactively renew *all* of your certificates, run
     "certbot-auto renew"
     - If you like Certbot, please consider supporting our work by:
    
     Donating to ISRG / Let's Encrypt: https://letsencrypt.org/donate
     Donating to EFF: https://eff.org/donate-le

    “Congratulations!” と出たら Let’s encrypt からの証明書取得は完了です。

    Apache に証明書を設定する

    まず SSL モジュールを有効化します。

    # a2enmod ssl

    ポートを修正し、取得した証明書を書き加えます。

    /etc/apache2/site-available/foo.conf

    <VirtualHost *:443>
    ...
        SSLCertificateFile /etc/letsencrypt/live/example.com/cert.pem
        SSLCertificateKeyFile /etc/letsencrypt/live/example.com/privkey.pem
        SSLCertificateChainFile /etc/letsencrypt/live/example.com/chain.pem
    ...
    
    </VirtualHost>

    設定を再読込して完了です。

    # systemctl reload apache2

    参考文献

  • CentOS 更新後に Aipo の時刻表示がずれる

    CentOS 更新後に Aipo の時刻表示がずれる

    CentOS 7 の更新を行ってからグループウェアの Aipo の時刻表示が 9 時間ずれるようになってしまいました(JST ではなく GMT で表示される)。そのときに試行錯誤しましたが、結論だけ示しておきます。

    まず OS のタイムゾーン設定が正しいかを確認します。

    # timedatectl
          Local time: Thu 2018-04-05 09:24:20 JST
      Universal time: Thu 2018-04-05 00:24:20 UTC
            RTC time: Thu 2018-04-05 00:24:19
           Time zone: Asia/Tokyo (JST, +0900)
         NTP enabled: yes
    NTP synchronized: yes
     RTC in local TZ: no
          DST active: n/a

    このとき、Time zone: が Asia/Tokyo (JST, +0900) になっていれば問題ありませんが、yum update のときに書き換ってしまったのか、異なる値になっていました。

    JST になっていなければ、JST に変更します。

    # timedatectl set-timezone Asia/Tokyo

    ちなみに、Aipo の動作環境(Tomcat)にもタイムゾーンの設定がありますが、初期状態でちゃんと設定されていました。Aipo の Tomcat のタイムゾーン設定は、インストール下ディレクトリ下の tomcat/conf/catalina.properties にあります。

    # vi /usr/local/aipo/tomcat/conf/catalina.properties
    ...
    ...
    ...
    user.timezone=Asia/Tokyo

    最後に Aipo を止めて念のため OS の再起動を行い、再度 Aipo を起動して無事に時刻表示が正しく JST になっているのを確認できました。

    # /usr/local/aipo/bin/backup.sh
    # /usr/local/aipo/bin/shutdown.sh
    # reboot
    # /usr/local/aipo/bin/startup.sh
  • Debian でコンソール画面の解像度を変更する

    普段サーバには Debian を使っていて、よほどの理由がない限り GUI は無効にしています。VirtualBox 環境でも初期解像度(640×480?)だと狭すぎるので、変更の仕方を書き記します。

    # /etc/default/grub
    # コメントアウトを外して好みの解像度に
    GRUB_GFXMODE=800x600
    # こちらは追記
    GRUB_GFXPAYLOAD_LINUX=keep
    # update-grub2
    # reboot

    参考